
One benefit of using WordPress is that you may invite others to collaborate with you on your site, however, collaborators must be part of the UCI community and have a UCInetID and @uci.edu address.
Currently, we are not allowing undergraduate students to create their own sites. However, a faculty or staff or graduate student can add an student to his or her site and assign a role of editor, author or contributor, thereby allowing the student to participate more fully.
By default, as the site owner, you are the Administrator and can assign access rights to collaborators based on their role.
How To Add An Existing User To Your Site
Existing Users are people who already have an account on the system. Anyone with a UCInetID can create an account by logging in, but they will not have a role on any site until they are added by an administrator to the site.
- Log in as an administrator. (Only administrators can add, edit, or remove users.)
- Go to Users > Add New
- Type in the person’s UCInetID or UCI email address.
- Choose the Role you would like them to have. Review the roles available and only give the person the access needed.
- Click Add Existing User
(If you see an error that the user does not exist, go to “How to Add a New User” below.)

How to Add a New User
What if the person does not already have an account? I received a message that the user does not exist.
Option 1 – Have them log in to your site
If the person does not already have an account, they can login using the Login link at the top of your site. This will create a user account on sites.uci.edu, but not give them a role on any site. Once they have logged in successfully, you can now add them as an existing user using the steps above.
Option 2 – Invite them to become a member of your site.
- Go to Users > Invite Users
- Type in an Invite Code. Keep it simple.
- Select the role you want the users to have.
- Click Add New Invite Code
- Copy the Invite Link and send it to the users you want to add.
The person receiving the email will be prompted to log in with their UCInetID to accept the invitation. They will be added to your site using the role you assigned. You can see how many times the invitation was used. Only people with a UCInetID can join or use this invitation. You can remove the invitation at any time. This is recommended once it is no longer needed. Hover over the Invite link and click Delete.

Managing Users
Once your new site user has accepted your invitation, you will see their name in your list of Users.
- Go to Users > All Users
- On the Users page, you can manage or remove users from your site.
- If you remove users, you can assign any posts they may have authored to someone else. Hover over the user’s UCInetID to see the Remove option.
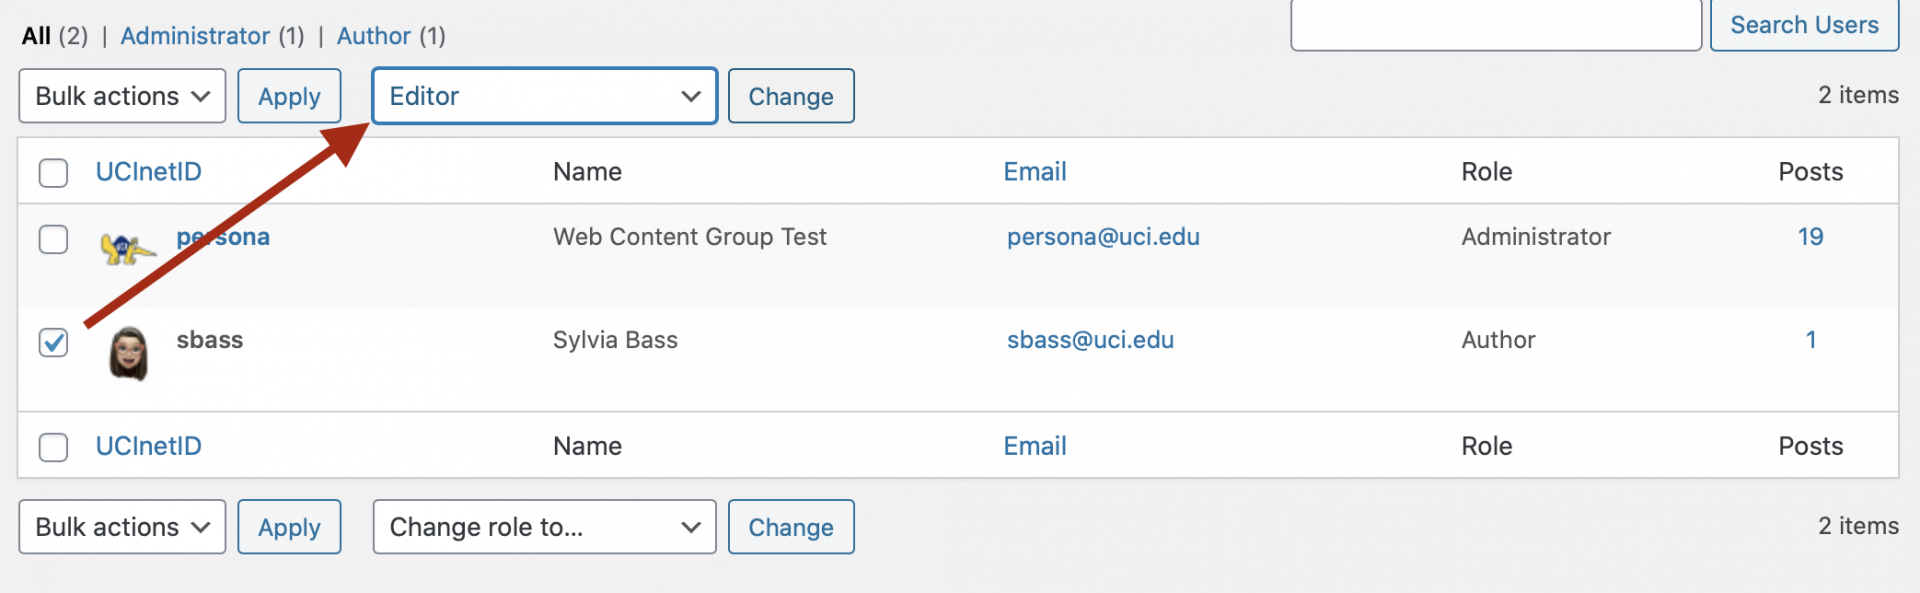
Changing a User’s Role
The administrator of the site can change a user’s role to increase or decrease the capabilities. OIT will not change a user’s role without the administrator’s permission. If you do not know who the administrator is, contact us and we can help you find out.
- Go to Users > All Users
- Check the box next to the user for whom you want to change the role.
- Select the desired role from the “Change role to…” drop-down menu above the list of users.
- Click the Change button.
Removing a User
If you want to remove a user from your site because they are no longer involved or have left UCI, any administrator can do so by following the steps below.
- As an administrator, go to Users > All Users
- Find the user you want to remove and hover over their username and select Remove
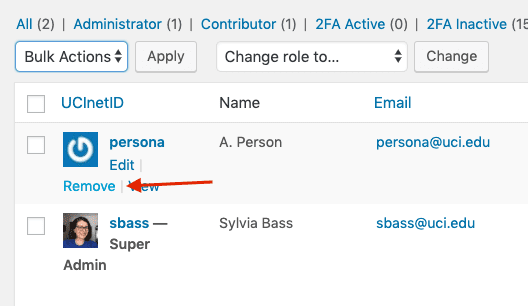
- Click Confirm Removal on the next screen.
More Questions?
Contact us. We’re here to help.